

Replacing a Cartridge in a Mixer Tap
The majority of taps are sold with ceramic disc cartridges or valves these days . I have discussed the topic of Ceramic Disc Valves previously for anyone that is unfamiliar with them. These do need maintenance sometimes to fix issues such as:
1. Dripping/leaking taps
2. Blocked or reduced flow rate
3. Gritty or stiff operation
4. Failure to turn on or off or change the temperature.
1. The cause of dripping taps is debris or limescale getting into the valve and causing the seal on the O-ring or the discs to fail. It is always recommended that filters are put in place before the tap to prevent debris getting in and that the lines are flushed before the tap is installed.
2. This issue is similar to the last where debris gets into the valve and blocks the inlet or outlet flows. Limescale can also be the cause, especially in hard water areas.
3. Again this is related to debris coming into the tap or limescale. Debris causes the ceramic discs to get clogged up and prevents the smooth operation of the handle.
4. Cartridges can be broken if excessive force is used and this prevents normal operation. This can happen if one of the other symptoms (1 – 3) is present and the valve is forced in an effort to try and get it to stop dripping etc.
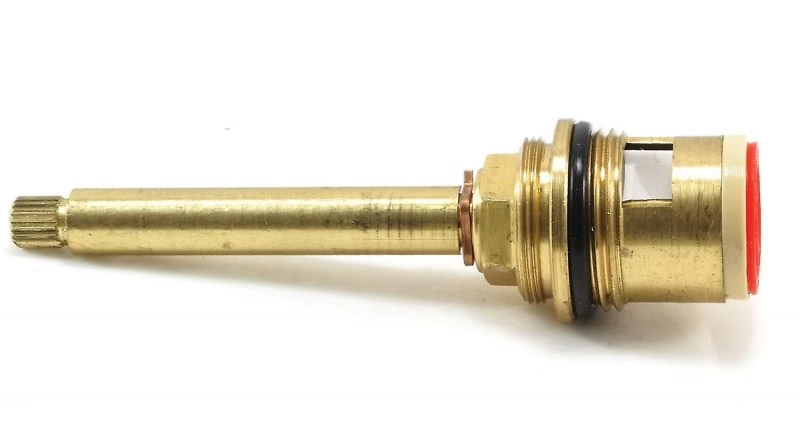
Types of Cermaic Cartridge Valve
There are two main types of Cermaic Disc Cartridge:
1. Ceramic Disc Cartridge for flow control only.
2. Ceramic Disc Cartridge for flow and temperature control.
This post will focus on the temperature and flow type as shown below.

Removing and Replacing the Cartridge
We recommend you always use a plumber for these jobs if you do not think it is something you feel comfortable with. It is quite straight forward though and should take in the region of 20 to 30 mins.
Tools Required: Screw Driver, adjustable spanner, Allen Keys. grease if necessary and potentially a blade like a Stanley Knife.
1. Stop the water flow to the tap using the isolating valves usually located under the sink. You complete this by turning them both clockwise until the water stops. Check the tap to make sure no water is still coming through after you have done this.

2. Remove the decorative cover on top of the tap handle. You can use your nail to do this or a blade being careful not to damage the surface finish.

3. Using an Allen Key remove the small grub screw that holds the handle on by turning anti clockwise. The handle should pull free when the grub screw is loose.

4. Next remove the decorative decorative dome shroud by turning anti clockwise. This should come off by hand.


5. Now remove the retaining nut using a spanner by turning anti clockwise. The nut will then come free of the tap.


6. After you can remove the cartridge by wiggling and pulling it gently until it comes free.


7. Now that we have the cartridge out it is a good idea to clean the inside of the chamber with soapy water and a cloth to remove any debris or limescale build up. You can grease the O rings here with a non corrosive grease if necessary and also grease the retaining nut if necessary.
8. You can now begin replacing the cartridge. Make sure that the two cartridge lugs match the mating holes in the tap mixing chamber above. You will feel it click into place and the top of the cartridge will be flat. Do not screw the retaining nut back in on a cartridge that is not seated correctly. If you do, then you will damage the cartridge and also cross thread the retaining nut.
9. Finish by tightening the retaining nut (not too tight or you will damage the cartridge) and replacing the decorative dome cover by turning both clockwise. Then, replace the handle, tighten the grub screw clockwise and replace the decorative handle cover with the hot side on the left.
And Finally..
10. To finish, reopen the isolating valves slowly and check for leaks. That’s it, the tap should now operate correctly! Hope this helped.
You can find mixer taps in our shop: www. thetapshop.ie


how do i change the cartridge on a Lincoln dual handle mixer tap. I can’t seem to access the cartridge once the tap handle is removed as the cartridge cover is conical in shape and I can’t see a retaining nut
Hi. Replacing 35cm normal cartridge valve retaining nut appears to be missing….are these available as spare parts
Hi Barry. If you send a picture via mail with the thread size and depth, we might be able to help.
Thank you for the info as I wasn’t 100% sure how it came apart but you put my mind at rest so straight forward .