Fitting a Bathroom Basin Tap
So, you have bought your nice new Tap and now all that is left is to fit it! This guide will illustrate how to fit a standard Bathroom Basin Mixer Tap on a single hole basin. Mixer taps are also sometimes referred to as “Mono” or “Monobloc” taps. This job is relatively easy and should be no problem for the average DIY enthusiast. It should take in the region of 30 to 40 mins to complete.
Tools required:
1. Flat head screw driver(s) and Philips head screw driver
2. Adjustable spanners
3. A bucket or basin to catch residual water from the old tap
Fittings required:
1. Tap fixing kit to fit the tap to the basin (included in all of our Taps here at thetapshop.ie)
2. Flexible tails to connect the tap to the water supply (included in all of our Taps here at thetapshop.ie)
3. Two 1/2″ isolating valves (if not already present). Basin taps are fed with 1/2″ copper pipe. Fitting these if they are not present will make maintenance easier as the system will only need to be drained from the isolating valve to the tap.
Fitting Steps:
1. Isolate the water supply. This can be done by closing the isolating valves with the screw driver by turning the screw clockwise. These valves should be located just underneath the tap basin as pictured below. If not, you may have to isolate the water at the cylinder or mains.

2. Remove the old tap. When you are sure the water is isolated, you can now remove the old tap. This step can be skipped if you have a new basin with no tap fitted. To remove the tap, unscrew the flexible tails (as per the image below) one at a time by turning anti-clockwise with the spanner. Be careful to catch the residual water that comes out of them in the bucket.
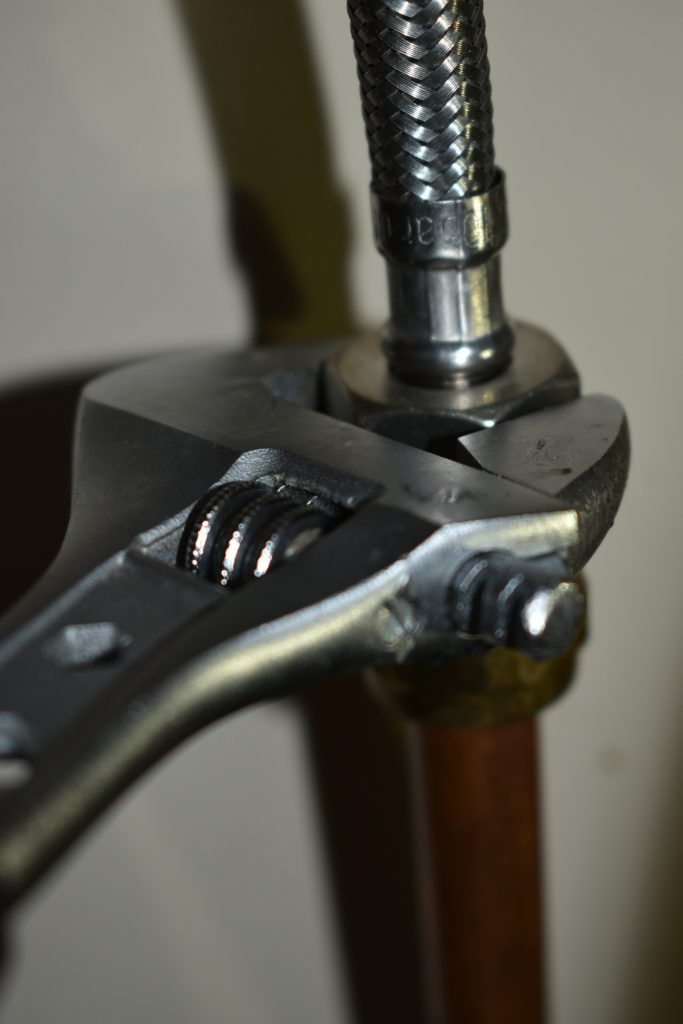
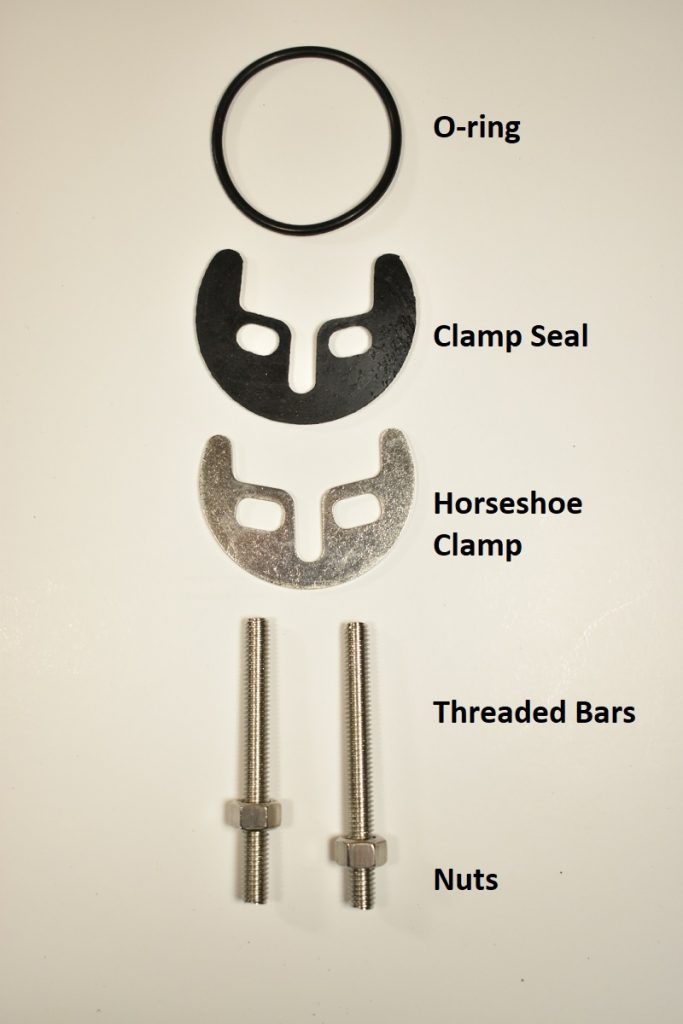
Then look underneath the basin as illustrated below and remove the nut(s) that clamps the tap to the basin. This frees the tap from the basin. You can then remove the washer and the horseshoe clamp. Now the tap is free from the basin and the water supply, you can pull it free from above the basin.


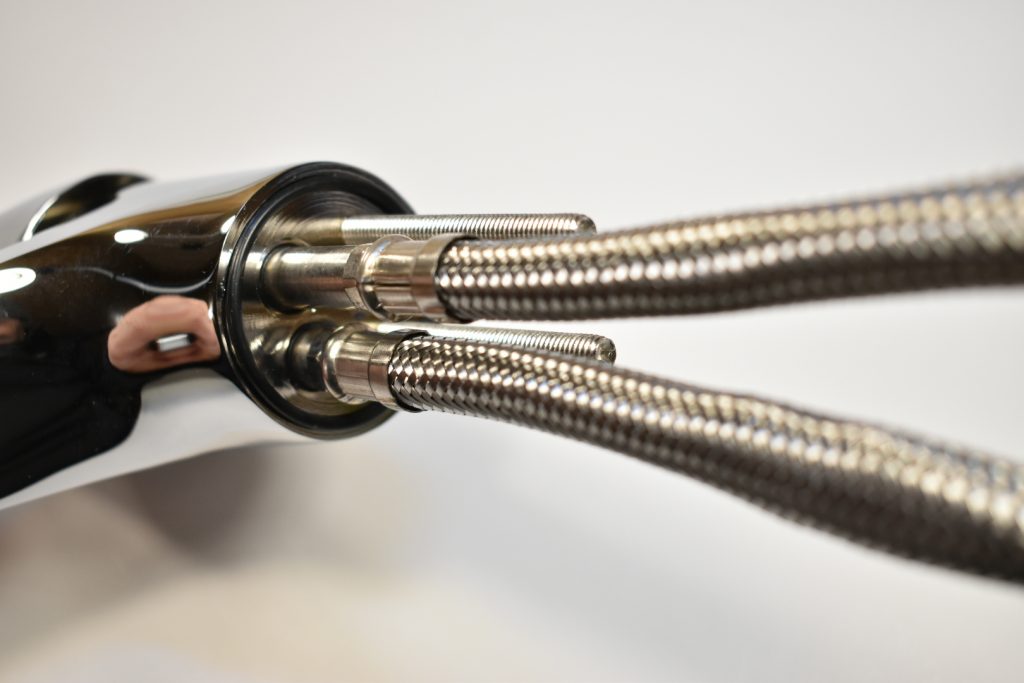
3. You can now fit the new tap. To do this, you must first assemble the tap. Attach the flexible hoses to the bottom of the tap as pictured below. Hand tightened and then given a small nip with the spanner. Do not over-tighten these hoses as it will cause the O-rings in the flexible hoses to be damaged which can cause leaks.
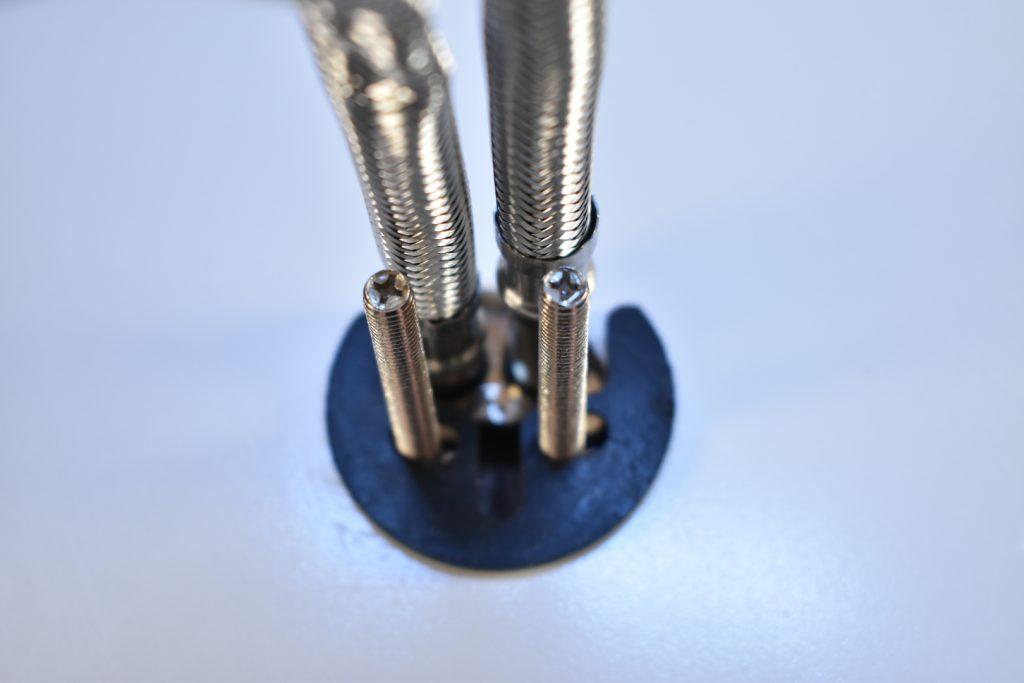
Now that the flexible hoses are attached, you can screw in the threaded fixing bar(s). These are simple screwed into the tap at the bottom by hand and then nipped up again using a screw driver. There are usually slots at the bottom of the threaded bar to allow this.
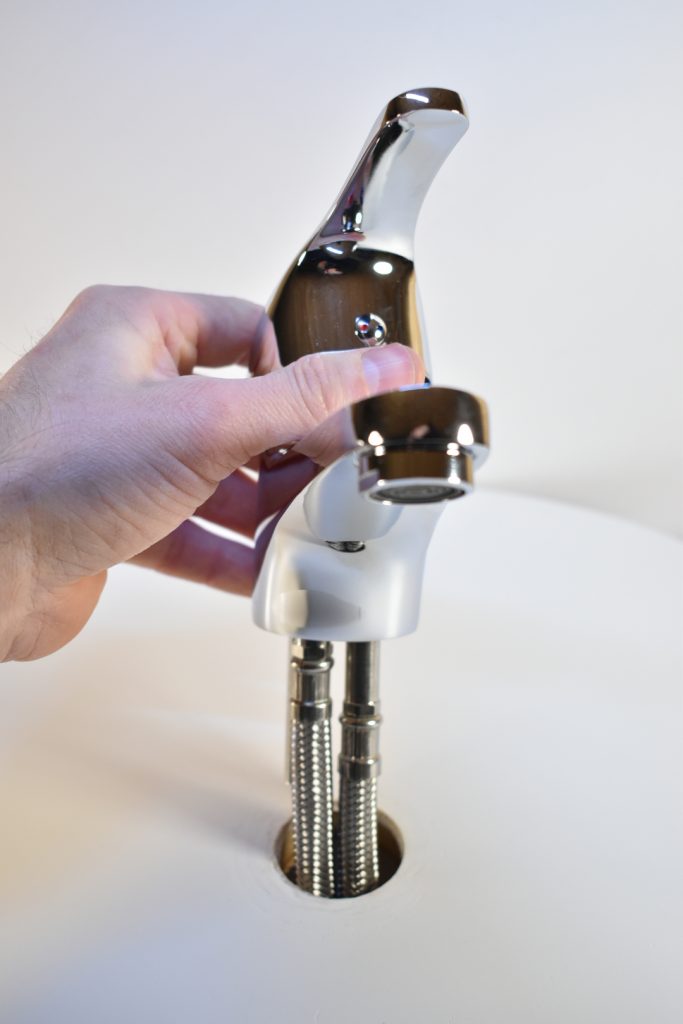
4. Now, the tap is assembled, it is time to fit it to the basin. To do this you take the tap with flexible tails and threaded bar fitted and gently lower it into the basin hole. The flexible tails will go in first, then the threaded bar and then the tap will sit on the basin.
The tap is now ready to be clamped to the basin. You must go under the basin to do this and it can be a little bit tight under there, as there will be a waste pipe for the basin waste water. Look underneath and find the threaded bar(s). When you locate them, slide the rubber washer over them and then the metal clamp (“horseshoe clamp”). When this is done take the nuts and screw them over the tube until hand tight. Then, make sure the tap is in position and nip the nuts with the spanner again making sure not to over-tighten as you may damage the basin.

Now the tap should be firmly fixed in place. Time to attach the flexible tails to the water supply. Simply hand tighten them onto the isolating valve thread by turning clockwise. When they are hand tight, give them a nip with the spanner making sure not to over-tighten. Make sure the flexible hose is not over extended or rubbing against anything as this could lead to wear and failure.

5. Reopen the isolating valves slightly by turning the screw anti-clockwise and check for any leaks. When you are satisfied the job is good, open them fully and test the tap.
All done! Hopefully this has helped and encouraged you to try this yourself! You can see our range of taps here. Thanks for visiting. Find us on Facebook!